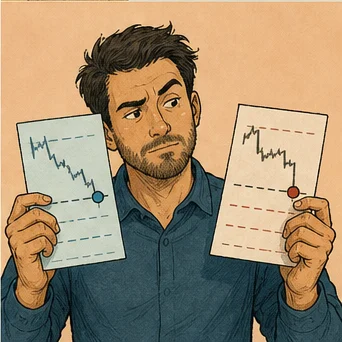

A pre-trade checklist is a simple but powerful tool for traders who want to catch preventable errors before money is on the line. It serves as a brief decision filter that verifies account status, risk parameters, market conditions, and technical order details. Without this pause, it is far too easy to slip into a rhythm of impulsive behavior that leads to avoidable losses. While the checklist cannot guarantee success or turn a bad idea into a profitable one, it provides the consistency needed to stay within your operational limits.
The primary goal of this tool is to foster a deliberate pause between identifying a setup and actually entering the trade. Instead of relying on memory or urgency, you follow a set procedure that forces you to acknowledge critical information. Many failures in prop trading environments happen not because of a bad strategy but because of sloppy execution. By institutionalizing a few simple checks, you reduce the impact of cognitive biases and help ensure that every trade is a conscious decision rather than a reactive movement.
This guide covers the essential components of a robust pre-trade process. You will find sections on verifying firm rules, assessing market timing, and managing your specific risk exposure. This guide explains why account status matters and how to inspect your order tickets to prevent basic errors. The focus remains on objectivity and precision. Follow these steps to build a workflow that guards your capital against the most common technical and tactical mistakes traders face during an evaluation or funded challenge.
If you are comparing independent preparation with structured support, the main prop firm passing service guide places prop firm challenge pre-trade checklist inside the complete evaluation process.
Confirm Your Operational Base
Your first step always begins at the dashboard. You must verify that the account you are viewing matches the one you intend to use. It is a common mistake to log into a demo or training account while thinking you are inside a live evaluation environment. This disconnect can lead to wasted effort or worse, taking risks that do not count toward your objectives. Always look at the specific account ID number displayed in your platform settings before you proceed with any other steps.
Beyond just identifying the account, you need a firm grasp of your available equity. Check the current balance and the real-time drawdown limit. Many traders assume they have a certain amount of buffer room, but commissions and floating losses from previous trades often chip away at that total. Do not rely on your memory from yesterday. Refresh the data to see exactly how much capital is currently accessible. If you do not know your exact remaining room, you cannot accurately calculate risk.
Verify account base figures
Consider a hypothetical case where you have a $50,000 account with a $2,500 trailing drawdown. If your current equity is $49,200, your effective buffer is only $1,700. If you blindly assumed you had the full $2,500 of room, you might set a stop loss that is actually too large for the account rules. Checking the exact figures keeps your risk management grounded in reality. Never guess your numbers when the interface provides them instantly.
Validate Against Firm Constraints
Every firm has a specific rule sheet that dictates what you can and cannot do. This includes approved instruments, minimum or maximum holding periods, and specific windows when trading is prohibited. Some platforms restrict you during major news releases or over the weekend. A checklist acts as a constant reminder of these limitations. If you rely on memory, you will eventually make a mistake. Checking the rules every time is the only way to ensure compliance.
Look for recent updates in the firm policies. Sometimes, these firms adjust their requirements about leverage or product eligibility. If you have been trading for a while, you might fall into a pattern of assuming that what worked last month will work today. This is a dangerous trap. Take 15 seconds to review the current active rules for your specific account tier. If any part of the rule set is ambiguous, stop and clarify it before you put any capital at risk.
Validate against firm restrictions
Failure cases often stem from ignoring these constraints. For instance, a trader might enter a position five minutes before a major central bank announcement, forgetting the rule that prohibits holding during high-impact events. Even if the trade is successful, the firm might penalize the account for violating the policy. This illustrates why the checklist must be treated as a mandatory gate. If you cannot confirm that your trade fits within every single rule, do not click the button.
Monitor the Market Schedule
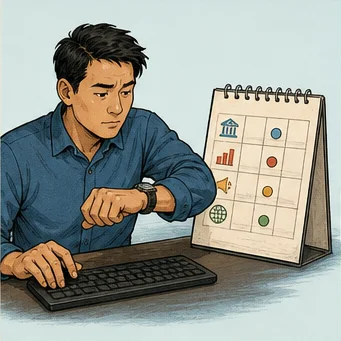
Trading in a vacuum is a mistake. The calendar is your best indicator of when to sit on your hands. High-impact news releases, interest rate decisions, and even holiday hours can cause massive volatility that has nothing to do with your technical pattern. You need to know these dates and times by heart or by clear reference. Before you even look for a setup, mark the dangerous times on your chart. This allows you to avoid being in a position during a period of random price movement.
Consider the impact of session transitions. Many traders lose money during the open or close of the main market hours because the liquidity shifts rapidly. If your strategy relies on consistent trend behavior, these times can be treacherous. Check your calendar for these specific transitions. It is much easier to decide to avoid a high-volatility window before you are already in a trade than it is to rationalize staying in a losing position once the news breaks.
Monitor the market schedule
Sometimes, the market delivers a surprise, such as a geopolitical headline that moves the price hundreds of points in seconds. While you cannot predict every such event, a good checklist reminds you to look at the broader environment. Are there major earnings reports coming up? Is there a central bank meeting today? A simple glance at a reliable economic calendar prevents you from being caught off guard. You are looking for stability in the environment, not just in your indicator.
Confirm the Trade Rationale
If you cannot explain why you are entering a trade in a single sentence, you probably should not take it. Your setup must match the current market context exactly. Identify the higher-level trend and the current liquidity environment. Is the price stuck in a tight range, or is it breaking out? Your strategy should clearly define the behavior you are looking for. If the current price action does not fit that description, then the signal you see might just be noise.
A useful exercise is to write down the reason for the trade before you place the order. For example, you might note that you are entering because the price hit a key support level in a bullish context. If you find yourself struggling to articulate this, it is a sign that the trade is too subjective. Subjective trades are rarely consistent. Stick to the logic that you have back-tested and confirmed as viable in your specific strategy.
Confirm trade rationale alignment
Also check if the price has already moved past the optimal entry area. If your plan was to buy at $100 but the price is now $102, the entire risk-reward ratio of your setup has shifted. An idea can be valid but poorly timed. If the entry is no longer where you expected, the math behind your stop loss and profit target might be broken. Be willing to wait for the setup to return to its ideal location rather than forcing a trade at a sub-optimal level.
Perform Precise Risk Calculations
Risk management is the heart of every successful challenge. You should never decide on your position size based on how you feel. Instead, calculate the volume based on the distance between your entry price and your invalidation point. If your stop loss is 10 points away and you want to risk $50, your contract size must be mathematically precise. Use a calculator or a template. Do not try to do this in your head, especially when you are under pressure.
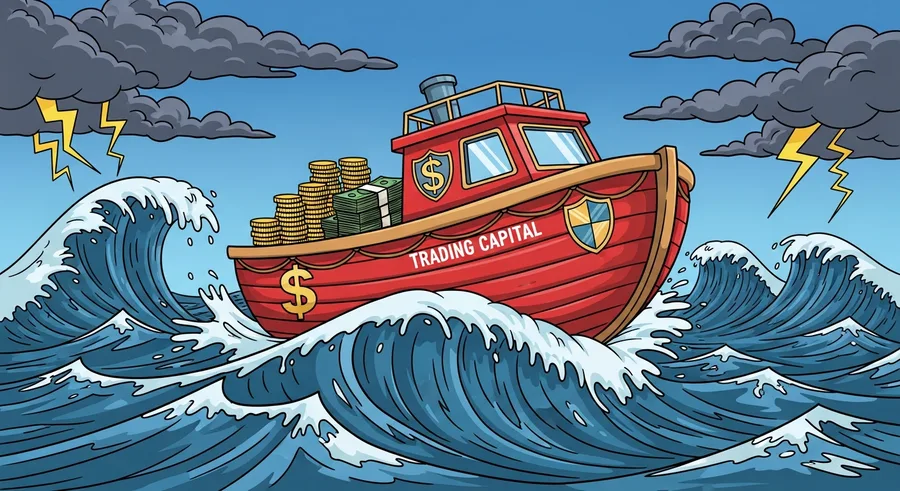
Consider the combined risk across all your open positions. Even if a new trade looks small, it might push your total exposure beyond your daily risk budget. This is a common failure case. A trader might have two small trades running and then add a third. Individually, each might be fine, but collectively they could exceed the drawdown threshold if a single correlated event moves them all against you. Check your total exposure before you hit enter.
Perform precise risk calculations
Include a buffer for slippage and execution costs. In many fast-moving markets, you might not get filled exactly at your target price. If you assume a perfect fill, you might set a stop that is too tight. Hypothetically, if the market spread is 2¢ and you ignore it in your math, you could be stopped out by the spread alone even if the move was correct. Always be conservative with your risk allowance to account for these market realities.
Execute with Technical Precision
When you are ready to send the order, verify every field on the ticket. Read the symbol name carefully to ensure you are not trading a similar-looking instrument. Confirm the direction, whether it is a buy or a sell. Double-check the order type, like limit or market, and ensure the volume matches your calculated risk. One wrong click can lead to an incorrect order that is difficult to fix once the market starts moving. Slow down and check every detail.
If you are placing a pending order, you must also define when it becomes invalid. A pending order that is not filled today might be triggered tomorrow, but the context may have completely changed by then. An unattended order is a liability. Know exactly what condition or time will lead you to cancel the order if it is not hit. A clear cancellation policy keeps your account from accumulating unwanted and dangerous positions while you are away from the screen.
The following list provides a final safety check for your order entry process: 1. Confirm the correct symbol suffix to avoid trading the wrong expiration or instrument. 2. Double-check your intended buy or sell direction to prevent a accidental reverse. 3. Validate that your volume matches your risk math exactly. 4. Set a clear expiry condition for any pending orders so they do not remain active indefinitely.
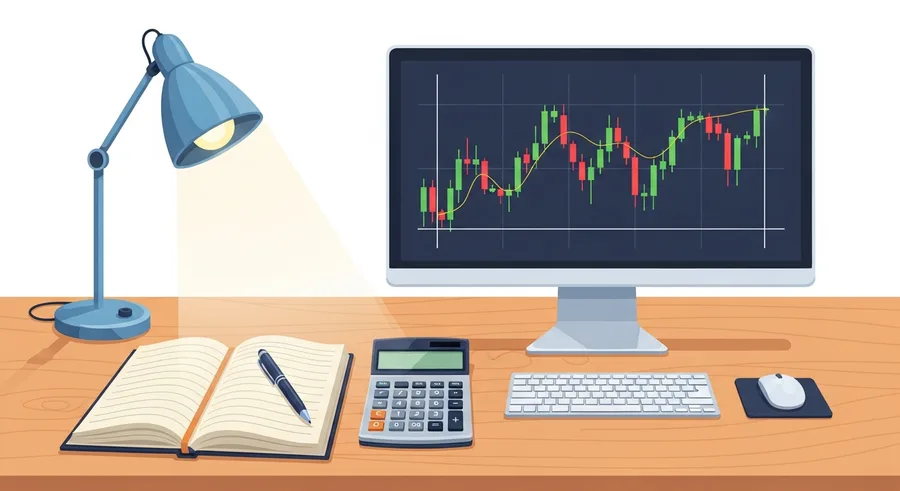
Related guide for Prop Firm Challenge Pre-Trade Checklist: A useful companion for this decision is Prop Firm Challenge Position Size Calculator Guide. Calculate quantity from a valid stop and cash risk, then confirm that the whole idea fits available drawdown, contract specifications, and real execution.
Define Your Management Strategy
Before you even send the order, you need to know what you will do once the trade is active. Will you move your stop to break even at a certain point? Will you scale out of the position, or will you take the full profit at one target? These are decisions that should be made before the trade, not during it. If you try to manage the trade based on how you feel in the moment, you will likely make emotional mistakes that widen your losses.
Define the conditions for both manual and automated exits. You should know exactly when you will intervene, but you must also know when it is best to do nothing at all. Watching every tick can tempt you to mess with a trade that is still within your plan. If the trade is still valid according to your analysis, you should let it play out. Do not touch the stop just because you feel nervous about a temporary price pull-back.
Define clear management strategy
Hypothetically, suppose your plan says to exit half the position when you hit $50 of profit. If the price reaches $48 and stalls, do not change your plan just because you want the profit now. Sticking to your pre-defined management strategy is how you maintain an edge. If you find yourself constantly changing your exits during a trade, it usually means your original plan was poorly designed or you are too anxious to follow it properly.
Maintain a Feedback Loop
Recording your trades is the only way to improve over time. Before you enter, note your rationale. After you exit, compare the actual outcome to your plan. Did you follow every step of your checklist? If you missed a step, mark it down. The goal is not to punish yourself for losing trades, as losses are a part of the game. The goal is to identify patterns where your execution failed due to skipping steps. This is the path to better performance.
If you find that you are frequently skipping items on your checklist, it is a sign that the list itself might be too long or your workflow is too hurried. Trading under excessive time pressure is a recipe for failure. If you feel like you do not have enough time to check your status, risk, and order details, then you are trading too fast. Simplify your process until it fits naturally into your session. A good workflow should feel like second nature, not a chore.
Maintain an active feedback loop
Review your recorded checklists every week. Are there recurring errors? Perhaps you keep forgetting to check the economic calendar, or you consistently struggle with position sizing. These are specific issues you can address one by one. Once you identify a weak point in your process, you can build a more specific check for it. Improvement comes from this constant cycle of checking, acting, recording, and refining your approach for the next session.
Understanding Session Dynamics
The time of day can drastically change how a strategy performs. Early in the session, volatility might be high, and order flow can be erratic. Towards the end of the day, liquidity often dries up, causing wider spreads. You must understand how your strategy handles these different conditions. If your system depends on tight spreads, you might want to avoid the market close. Include a check for current time and volatility levels to ensure the environment is suitable for your method.
Consider how your own energy levels affect your decision making. If you have been sitting at the screen for four hours, your ability to stick to the checklist may decline. Some traders find that their best execution happens in the first two hours of their session. If you are exhausted, your brain will look for shortcuts, which is when mistakes happen. It is perfectly fine to stop trading early if you notice your mental focus is starting to fade.
Assess current session dynamics
Always evaluate the market intensity before placing your first trade of the day. Is the volume consistent with what you expect? If you see strange price gaps or a lack of depth in the order book, it might be safer to step aside. Your checklist should include a quick verification of market health. If the environment feels wrong, trust your intuition enough to delay your trading until the market demonstrates the conditions you need for your strategy.
Maintaining Consistent Habits
Consistency is not about being right; it is about following your process every time. Even when a trade looks incredibly promising, you must still run through your checklist. The moment you decide to skip the process because you are sure of the outcome is the moment you become vulnerable. A good trader treats every entry with the same level of skepticism and scrutiny, regardless of whether it is their first trade of the day or their fifth.
Think of the checklist as your professional filter. It is there to stop you from acting on impulse or boredom. If you have had a string of losses, you might be tempted to force a trade to make back your money. This is when a checklist is most valuable. By forcing yourself to go through the steps of confirming risk and rationale, you break the cycle of emotional reactivity. It gives you a reason to pause when your brain is screaming to act.
Keep consistent trading habits
If you find it difficult to maintain this discipline, try to keep your checklist in a physical format or a simple digital document that sits next to your order ticket. Make it as easy as possible to interact with. If it is buried in a folder or hard to read, you will stop using it. Keep the language simple and the steps actionable. Your goal is to make the right choice the easiest one to make during your trading session.
Refining Your Process Over Time
Your checklist should evolve alongside your trading. As you learn more about your own tendencies and the specific challenges of your firm, you will find items that can be removed and others that need to be added. If you have never made a mistake with symbol suffixes, you might not need to emphasize it as much. However, if you keep making errors with position sizing, that item needs to stay at the very top of your list until it is fixed.
Be careful not to overcomplicate the list. A 50-item checklist is just as bad as no checklist at all because you will never use it. Keep it focused on the most critical failure points. These are the technical and procedural mistakes that you have actually made in the past. If you have never run into a specific issue, do not clutter your process with a check for it. Stick to what actually matters for your specific strategy and account requirements.
Refine checklist over time
When you make a significant change to your strategy, you should also update your checklist. A new instrument might have different margin requirements or volatility profiles. A new order type might require different entry criteria. Always revisit your procedure whenever your trading plan shifts. This keeps your process relevant and effective. Your goal is to have a set of habits that grow more refined and reliable as you gain more experience in the market.

Related guide for Prop Firm Challenge Pre-Trade Checklist: For the next practical part of your preparation, continue with Can You Trade News During a Prop Firm Challenge?. News permission depends on the program and account stage. Use this guide to check windows, manage open risk, and avoid assumptions in fast markets.
Managing the Mental Load
Trading requires significant mental energy, and managing your focus is part of the job. A pre-trade checklist helps reduce the cognitive load by automating the routine parts of your decision. You do not have to think about account numbers or basic risk math if you have a reliable procedure. This allows you to focus your mental energy on the actual analysis of the market. It clears the clutter from your mind, leaving more capacity for strategy and patience.
Recognize the signs of mental fatigue. If you are rushing through your checklist or finding yourself irritated by the steps, it is time to take a break. Your mental state is a critical variable in your trading success. If you are not in a clear headspace, your ability to execute even a perfect plan will be compromised. The checklist is a diagnostic tool for your own state of mind as much as it is for the trade.
Manage your mental load
A calm, objective approach is what you are striving for. The checklist is your tether to that state of mind. It reminds you to stay professional and detached from the result of the trade. If you feel like you are gambling rather than trading, stop and reset. Review your checklist. If you cannot honestly say that you have met all your criteria, then that is your signal to stay out. Protecting your capital is always more important than placing another trade.
Verifying Instrument Liquidity and Spread Costs
Before entering any position, you must verify the liquidity of the specific instrument. Thinly traded assets often feature wide bid-ask spreads that eat into your profit potential before you even begin. A price quote might show a tight spread, but the actual execution price could be significantly different once you place an order. You need to observe the depth of the order book for several minutes to ensure that your intended position size will not cause excessive slippage. If the market depth cannot comfortably handle your order, you risk getting an unfavorable fill that shifts your risk-reward profile significantly.
Consider a hypothetical example where you want to trade a contract with a $50 value per tick. If the order book shows only 2 contracts available at your target price, but you plan to enter with 10 contracts, your order will likely sweep through multiple levels of the book. This creates a hidden cost. You might expect an entry at $1,000, but your average fill could end up at $1,005. If you fail to account for this $5 per contract slippage in your checklist, your risk management math is fundamentally flawed. Always verify the volume available at your entry price level.
Verify liquidity and spread costs
Market hours often influence liquidity levels in unexpected ways. Mid-day lulls frequently cause spreads to expand, even in major index futures. If your strategy relies on quick entries and exits, these lulls are dangerous. Add a step to your checklist to observe the spread size relative to your expected profit target. If the spread represents more than 15% of your total target distance, the trade is mathematically inefficient. Walking away from a high-cost environment is a sign of a disciplined trader who understands that not every price move is worth pursuing.
Check for recent volume spikes that might indicate an anomaly in the instrument. A sudden increase in volume without a corresponding price move could suggest upcoming news or a technical glitch. If the chart pattern looks messy or the candles are fragmented due to a lack of trades, step back. You need a smooth and liquid environment to execute your strategy reliably. Relying on visual confirmation of healthy, continuous price action on a 1-minute or 5-minute chart is a practical way to ensure the instrument is currently suitable for entry.
Validate approved trade symbols
Always cross-reference the instrument with your firm list of tradable assets. Some firms allow certain products only during specific sessions or after you reach a certain funded status. Attempting to trade an restricted product can lead to automatic account disqualification. Your checklist should include a quick verification that the ticker symbol is explicitly approved for your current account tier. Do not assume that because a symbol appears on your platform it is cleared for you to trade. A quick validation step protects you from these preventable administrative traps.
Managing Aggregate Correlation Risks
Traders often make the error of treating every trade as an isolated event, forgetting that many assets move in tandem. If you open a long position in two different index futures that share a 90% correlation, you are essentially doubling your risk on a single market view. Your checklist must account for total net exposure rather than just the risk of a single trade. If you already have a position in a correlated asset, you should reduce the size of your new entry proportionally. Failing to aggregate these risks is the fastest way to hit a drawdown limit during a localized market correction.
Manage aggregate correlation risks
Perform a quick mental audit of your current portfolio before executing a new trade. Are you long on multiple assets that react to the same economic news? If the answer is yes, you are over-leveraged to a specific outcome. Hypothetically, if you hold 5 contracts of a major tech index and decide to add 3 contracts of a tech-heavy sector ETF, your effective risk is 8 contracts deep into a single sector. If a sudden headline hits that impacts technology companies, the simultaneous drawdown on both positions could exceed your daily loss limit. Always calculate your exposure as if all your correlated trades will stop out at the same time.
Consider the role of inverse correlations in your risk management. You might hold a long position in an asset that traditionally moves opposite to the dollar. If the dollar strengthens unexpectedly, both your direct trade and your hedge might perform poorly if the correlation breaks down during high volatility. Do not rely on historical correlation data to save you during a crisis. Assume that in extreme conditions, correlations tend to move toward 1, meaning everything moves together. Checking your total net exposure is a vital step in maintaining account survival.
Track portfolio concentration limits
Create a simple grid in your journal to track your open positions by sector or asset class. When you find a new setup, look at this grid before clicking buy or sell. If adding the new position creates a cluster in a single asset class, ask yourself if the risk is worth the concentration. A balanced portfolio is usually more resilient to the random noise of the market. If you cannot justify the extra concentration, pass on the trade. There will always be other opportunities that do not require you to take on excessive sector-specific risk.
Use your checklist to enforce a maximum total risk threshold that applies to your entire portfolio. For example, if your max daily risk is $1,000, ensure that the combined potential loss of all open trades does not exceed this amount. Even if you have 3 open trades with tight stops, the sum of those stop-loss distances in dollar terms must remain below your daily threshold. This simple addition check keeps your account safe from unforeseen events that affect the broader market. Discipline here is the difference between a minor setback and a blown account.
Verifying Technical Configuration and Fail-safes
Software glitches and network delays happen at the worst possible times. Your pre-trade checklist should include a verification of your platform connectivity and data stream health. A slight lag in price updates might seem trivial, but it can cause you to enter at a price that no longer exists. Check your platform latency indicator or observe the price ticks to ensure they are moving in real time. If the data feed feels sluggish or stutters, do not attempt to trade. A few minutes of patience can save you from an execution error caused by bad data.
Inspect your hotkeys and execution buttons before starting your session. It is surprisingly easy to accidentally move a button or change a setting that modifies your order behavior. For instance, if you have a hotkey that automatically attaches a profit target to your order, make sure that target distance is still set to your current strategy requirements. A change in these settings could lead to unexpected exits that lock you out of a winning trade or leave you exposed to a larger loss than you intended. Test your buttons with a tiny, non-risk order if you feel unsure.
Verify technical configurations
Hypothetically, imagine you have a hotkey configured to enter with 2 contracts, but you updated your strategy to use 1 contract for this specific account. If you fail to verify your order settings, you will double your intended risk. This is a common, high-impact error. Before you start, open the order configuration panel and look at the default volume and order type. Confirming that your platform settings align with your current strategy plan is a necessary gate. Never trade on the assumption that the software settings are exactly as you left them yesterday.
Review your automated stop-loss and take-profit rules within the platform. Most platforms allow you to set an automatic exit the moment you enter a position. If this feature is disabled or set to the wrong distance, you are trading naked. This is incredibly dangerous. Ensure that your safety orders are enabled and configured to your pre-defined risk parameters. A quick glance at the active order settings ensures that you are protected against sudden market moves. If the safety net is not active, do not execute the trade until it is configured correctly.
Maintain emergency platform access
Consider having a backup plan for when your primary platform fails. If the internet connection drops or the broker server goes down, how will you manage your open trades? Having a mobile version of your platform with your login credentials ready is a basic safeguard. Periodically check that you can access your account from an alternative device. Knowing that you have a path to close a trade if your computer fails gives you the peace of mind to focus on the market. Adding a quick check for this readiness to your morning routine helps ensure you stay in control.
Adapting to Rapid Contextual Shifts
Market conditions are dynamic, and a setup that worked an hour ago might be invalid now. Your checklist must include a review of the current market structure. Look at the last 2 hours of price action. Has the market transitioned from a trending state into a range-bound state? If your strategy requires a trend, trading in a range will almost certainly lead to losses. You need to verify that the environment still supports the logic of your strategy before every single entry. Do not trade the setup you wanted; trade the market that is actually in front of you.
Evaluate the proximity of major support and resistance levels. A trade entry that looked perfect when it started might now be right on top of a significant barrier. If the price is approaching a major daily high or low, the likelihood of a reversal increases regardless of your indicator signals. Check your chart for these hidden walls before you commit capital. If your entry is too close to a major level, wait for a breakout or a clear rejection. Trying to force a trade through a wall is a low-probability gamble.
Adapt to rapid market shifts
Consider a hypothetical case where you are looking for a long entry at $150 based on a momentum indicator. If the price has risen quickly and is now hitting a historical resistance level at $152, your room for growth is extremely limited. Even if the momentum is strong, the upside potential does not justify the risk of a reversal at that level. A good checklist forces you to acknowledge these obstacles. If the math of the move does not allow for a enough reward, it is better to wait for a better entry point or look for a different setup entirely.
Monitor the volatility levels of the market compared to the last few days. If the market is moving significantly faster than usual, your stop-loss distances need to be adjusted. Using the same 10-tick stop during a high-volatility event as you would during a quiet period is a recipe for being stopped out by standard market noise. If the current average true range of the market is elevated, widen your stops or reduce your position size. Adapting to the current volatility environment is a key part of surviving a funded challenge.
Align with market sentiment
Always confirm that the broader market sentiment aligns with your position. If you are buying an individual asset but the overall market indices are crashing, your trade has a much lower chance of success. This is often referred to as trading against the tide. A quick glance at a broad market index is a simple final check that can save you from swimming upstream. If the market is clearly risk-off, prioritize short trades or stay on the sidelines. Staying aligned with the major market participants increases your edge significantly over time.
Final Takeaway
A useful checklist creates a deliberate pause between seeing a price move and sending an order. It protects the trader from wrong-account, wrong-size, rule, and context errors that are avoidable.
Keep it current and testable. If an item cannot be checked quickly from a reliable source, refine the workflow before depending on it during a challenge. Consistency in following these steps will safeguard your capital and help you maintain the discipline required to navigate market volatility successfully.