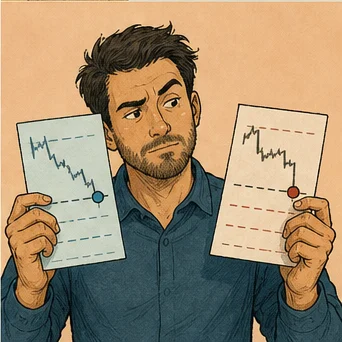
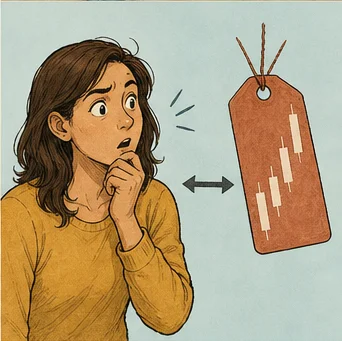
Position sizing stands as the primary bridge between a sound chart theory and an account that survives the evaluation process. Most participants focus on the excitement of a potential move, yet the actual balance advertised by a firm is rarely the amount you can safely risk. The reality of a managed account involves strict drawdown limits that dictate your longevity. You must view usable capital not as the total equity, but as the remaining distance to your strictest active drawdown threshold. This figure must account for your floating losses, the costs of execution, and the buffer required to maintain your operations over time.
The process begins by starting every single order with a defined dollar loss target rather than a generic lot size. You arrive at this number by dividing your chosen dollar risk by the physical distance to your stop, then multiplying that result by the specific instrument value per point. It remains vital to verify these inputs directly within your platform contract specification and margin requirements. When you shift your focus from units of currency to units of risk, you effectively stop trading the market sentiment and start managing your specific professional survival in the firm environment.
If you are comparing independent preparation with structured support, the main prop firm passing service guide places position sizing for prop firm challenges: protect the drawdown buffer inside the complete evaluation process.
The Position-Sizing Basics
Calculating your position size should always be a deliberate, mechanical process. You start by determining the total dollar amount you are comfortable risking on a specific trade setup. You then divide this number by the distance from your entry to your stop loss. Once you have that quotient, you multiply it by the point value of the asset. This creates the base number of contracts or shares. Never skip the step of checking the contract specification, as one lot, point, or pip fluctuates significantly in value between forex, indices, and commodity futures.
Consider the hidden impact of transaction costs on your risk model. You must add the estimated spread and the broker commission to your total loss calculation for each position. If you ignore these costs, a technically correct size will still exceed your intended risk allowance. For instance, if you aim to risk $100 on a trade and ignore $10 in commission, your real exposure is $110. This extra $10 counts toward your drawdown limit and can cause a violation during a string of tight trades.
Master position sizing basics
Precision in your math prevents avoidable errors. Use a spreadsheet or a reliable calculation tool to handle these inputs. You should always round down your calculated quantity to ensure you remain below your absolute risk threshold. Taking a slightly smaller position than the limit is always safer than over-leveraging due to rounding errors. Once you confirm the contract size and the value per pip, you eliminate the guesswork. This standardizes your approach, meaning every trade carries the same emotional and financial weight, which simplifies your overall decision-making during volatile market sessions.
Size From the Challenge Buffer
The real reference point for your sizing is the distance remaining to your nearest breach, not the nominal account balance. A common mistake involves looking at the starting account balance and assuming you have full access to that amount for risk. In reality, a recent loss or a trailing drawdown can shrink your usable room much faster than the dashboard headline suggests. You must update your available capital figure before every single trade to reflect the current state of your drawdown buffer.
Establish a personal safety buffer well inside both your daily and total drawdown limits. If the smaller remaining buffer cannot support your standard, volatility-adjusted stop, you must exercise discipline. It is better to skip a trade or reduce your position size to the point where it fits than to compress a stop to an unrealistic level just to force a trade. When your buffer is tight, your primary goal must shift from generating gains to protecting the remaining capital you have left to finish the challenge.
Scale from challenge buffers
Consider a hypothetical case where your total drawdown limit is $5,000 and your floating loss is $4,200. Your usable buffer is only $800. If you attempt to risk $500 on a setup, you are risking over 60% of your remaining room. This is rarely a smart play. You should scale your risk to fit the buffer size. By protecting the remaining cushion, you preserve your ability to continue trading when a better, higher-probability opportunity presents itself later in the week or month.
Correlation and Portfolio Exposure
Opening multiple positions in correlated assets can lead to concentrated macro bets without you realizing it. For example, if you go long on the S&P 500 and the Nasdaq simultaneously, you are effectively doubling your exposure to the same market movement. Separate order tickets do not create separate risk when the same underlying driver can move both assets in the same direction. When the market turns against you, the combined loss on these tickets can cause a sudden, unexpected drop in your account equity.
Measure the combined worst-case loss of all your open positions at their respective stop levels, then cap the entire group rather than viewing each position in isolation. Correlation often tightens during news events, central bank meetings, or periods of high market stress. In these moments, assets that usually move independently can suddenly synchronize. You must account for this by treating the aggregate risk of your open basket as a single line item against your available drawdown buffer.
Review portfolio correlation risks
If you hold three different currency pairs that all rely on the strength of the dollar, you possess a singular, high-leverage bet on the US economy. Should the dollar weaken, all three positions will reach their stops at the same time. This can cause you to breach your daily drawdown limit in a single motion. Always review your total portfolio exposure at the end of every hour, and never allow the sum of your open stops to exceed your predetermined daily risk threshold, regardless of how promising the individual setups appear.

Volatility-Adjusted Stops
Stops need enough distance to account for the market's current volatility, but a wider stop requires a smaller position size to maintain the same risk. If you keep your position size constant while widening your stop to avoid market noise, you are unintentionally increasing the dollar risk of the trade. Conversely, if you force a tight stop on a volatile instrument to maintain a large position, you increase the likelihood of getting stopped out by random price swings that do not invalidate your original thesis.
Use a consistent volatility reference, such as a multi-day average true range, to determine where your stop should sit. Once you have a logical stop distance based on the market conditions, calculate your position size using that distance. If the resulting position size is too small to justify the effort or if the reward-to-risk ratio becomes unattractive, then the trade itself is not worth taking. Rejecting a trade because the math does not work is a sign of a mature, disciplined professional approach.
Adjust stops for volatility
A tight stop is not automatically safer than a wider one. Often, a tight stop forces you into smaller position sizes that fail to produce meaningful results, or it invites frequent early exits. Focus on placing your stops at levels where the setup is genuinely invalidated by price action. Once that point is identified, adapt your quantity to fit the risk budget. This ensures you stay in the game for the long run, even when the market enters a period of high volatility that requires wider price protection.
Scaling In and Scaling Out
Adding a second entry is not a fresh allowance for risk. You must calculate the total loss of all combined entries at the common invalidation point before adding a new position. If you add to a trade that is already showing a profit, you might feel like you are using house money, but the entire position remains vulnerable to a sharp reversal. Always factor in the possibility of worse fills if the market spikes through your planned stop levels during a high-volatility event.
Plan your partial exits and your potential additions before the very first order is executed. Improvised scaling often hides a larger losing position behind several small tickets. If you add to a losing trade in hopes that it will turn around, you are effectively engaging in martingale-style behavior. This is the fastest way to hit your drawdown limit and terminate your challenge. Stick to a predetermined plan where additions only occur under specific, favorable conditions, and exits are executed as planned.
Manage scaling entry risks
Consider an illustrative example where you enter a position with 1 lot, and your stop is 20 points away. You then decide to add another lot as price moves in your favor. If you fail to move your stop or account for the new total risk, you are now risking 40 points worth of total movement. This doubling of risk can quickly erode your drawdown buffer if the market retraces. By mapping out your total risk exposure across all scaling levels beforehand, you avoid the trap of creeping over-leverage.
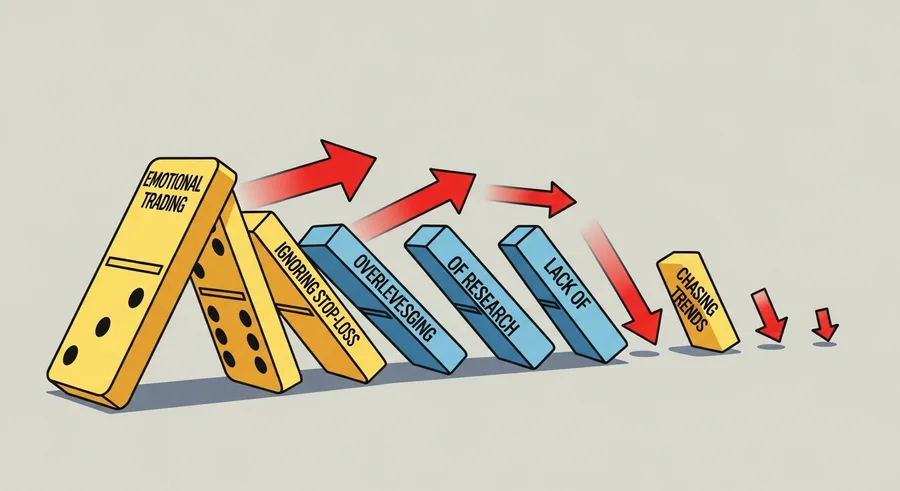
Related guide for Position Sizing for Prop Firm Challenges: Protect the Drawdown Buffer: A useful companion for this decision is Advanced Prop Firm Challenge Risk Management for Consistent Execution. Advanced risk management is not about taking more risk. It is about seeing the risk the account already has across positions, sessions, events, and changing volatility.
The Daily Stop and the Hard Stop
A personal daily stop serves as a circuit breaker placed well below the firm's hard limit. It preserves your ability to continue trading the next day by protecting you from the psychological toll of a disastrous session. You should never treat the maximum permitted drawdown as a target for your daily losses. By setting a stop at, for example, 50% of your firm-allowed daily limit, you ensure that even after a bad day, you still have the capital to fight back in the following session.
Make your personal stop operational and mandatory. When you reach this level, you must close all open orders, cancel any pending limit or stop orders, record your performance, and step away from the platform entirely. Any discretionary exception, such as deciding to push just a little further to make back a loss, defeats the entire purpose of the system. The market will always be there tomorrow, but your account balance is only available for as long as you respect the established safety boundaries.
Use daily stop losses
Think of the daily stop as a premium paid to keep your evaluation account active. It is not an admission of failure but a strategic decision to prevent a single bad session from becoming a terminal event for your account. If you hit your personal daily stop regularly, it is a clear indicator that your current strategy or your current sizing model is not appropriate for the conditions you are facing. Use these stops as a signal to pause, review your data, and adjust your approach before risking more capital.
Build a Position-Size Calculator
A reliable position-size calculator should be the most important tool on your desk. It needs to display your entry price, stop-loss level, the instrument's point value, your desired quantity, the estimated trading costs, the total risk, and your remaining daily and total buffers. Having these inputs visible at all times makes errors much easier to spot. If your calculator shows that a trade risks 5% of your total account, you will see it instantly and know to adjust your quantity before placing the order.
Test your calculator regularly with small trades to ensure the math matches your platform's contract specifications. Different instruments have unique multipliers, and brokers can change commission rates without major announcements. Updating your calculator whenever you switch asset classes or change your account currency is non-negotiable. If you cannot explain every part of the output, you should not rely on it for your live executions. Keep the formulas simple and robust to avoid errors during high-pressure trading moments.
Create position size calculators
The calculator helps you translate complex risk parameters into a single actionable lot size. By standardizing the input fields, you remove the emotional burden of calculating risk in your head. When the market moves fast, you want a tool that gives you a consistent answer every time. Spend the time required to build a spreadsheet that works perfectly for your specific needs, and then treat it as a secondary, mandatory check before your fingers hit the button to send any order to the market.

What a Passing Service Should Monitor
A service that promotes responsible trading should be able to show you the exact exposure and remaining buffer it is using at any moment. You should be wary of any entity that speaks in generalities about conservative trading without providing the tools or metrics to actually measure it. If you cannot see your own risk in real time, you are flying blind. Demand transparency in how the service reports your floating loss and how it accounts for the potential impact of your open positions on your total drawdown limit.
Ask how the service handles correlated orders, specific event windows, and the aftermath of a losing day. The answers you receive should align perfectly with the figures available in your user dashboard. If the explanation does not match the dashboard data, it indicates a lack of precision in the firm's risk management infrastructure. You want a provider that treats the drawdown buffer with the same mechanical seriousness that you do. Transparency here is not a luxury; it is a fundamental requirement for your professional development.
Monitor provider risk protocols
Consider the way a provider calculates the impact of an event window, such as a major economic announcement. A good service will explain how they account for widened spreads or potential slippage during these times. They should provide clear guidance on how your position sizing needs to change during high-volatility events to avoid accidental limit breaches. If the service providers themselves do not prioritize these factors, you should question whether their risk protocols are enough to protect your long-term interests and account integrity.
Building a Consistent Execution Rhythm
Trading requires a steady, repeatable rhythm. When you enter the market, you should not be wondering about your size or your stop distance. These should be predetermined by your model before the market even opens. By standardizing the way you approach every trade, you remove the variable of emotional decision-making. Consistency in sizing builds a baseline of performance that allows you to analyze what is working and what is not in your strategy.
Monitor your execution rhythm across multiple days. If you find that you are constantly adjusting your size or your stops in the middle of a trade, you have not finalized your plan. A professional trader enters with a plan, manages the trade according to that plan, and exits when the plan dictates. Any deviation from this is a form of gambling. By building a clear, mechanical process, you align your actions with the goal of passing the evaluation and moving into a funded state.
Build consistent execution rhythms
Consider the impact of fatigue on your rhythm. Late in the day, your decision-making capacity decreases. Many traders make their biggest mistakes when they are tired and trying to recoup a loss from the morning. Stick to a specific trading window where your focus is sharpest. If you find your discipline slipping, it is time to stop. Protecting your account from yourself is just as important as protecting it from the market movements that occur during your trading sessions.

Related guide for Position Sizing for Prop Firm Challenges: Protect the Drawdown Buffer: For the next practical part of your preparation, continue with The Prop Firm Challenge Trading Plan: A Day-by-Day Framework. A written daily routine makes it easier to follow challenge rules when the market and your emotions become noisy. Use this framework as a starting point.
Maintaining Mathematical Discipline
Discipline in trading is ultimately about the math. If you refuse to follow your position-sizing rules, you are making a choice to prioritize a specific trade over the long-term survival of your account. The firm's limits are not suggestions; they are hard binary walls that will end your participation if touched. You must respect the math at all times, even when you are certain that a specific trade will move in your favor. Certainty is a dangerous emotion in the financial markets.
Hypothetically, suppose you have a risk limit of 2% per trade and your account is currently at $50,000. Your max risk is $1,000. If you decide to take a risk of $2,000 because you really like the chart setup, you are violating your own rule. Even if that trade wins, you have compromised your discipline. Over time, these small breaches accumulate. They lead to larger, more frequent violations that eventually result in a permanent loss of your evaluation account.
Maintain strict mathematical discipline
Keep a detailed log of every trade you take, including the calculated risk and the actual risk incurred. Review this log at the end of every week to see if you are drifting from your rules. If you notice a trend where you are consistently over-sizing, take a break. Reset your mindset and come back only when you are ready to strictly adhere to your mathematical boundaries. This level of self-monitoring is what separates those who struggle in evaluations from those who successfully navigate them.
Balancing Risk and Reward
While sizing is primarily about risk management, it is also intrinsically linked to your reward potential. If you size your positions too small to hit your profit targets, you are not being safe; you are being ineffective. You must find the balance where your position size is large enough to make a difference in your account equity, but small enough that any single loss does not trigger a breach of your drawdown limits. This balance is specific to your strategy and your personality.
Examine your win rate and average gain to determine the appropriate sizing for your trading style. If you have a high win rate, you might be able to afford slightly larger position sizes. If you have a lower win rate, you need to keep your positions smaller to survive the inevitable strings of losses. Do not copy the sizing models of others, as their risk tolerance and account size are likely different from your own. Build a model that reflects your reality.
Balance risk and reward
Always focus on the risk-to-reward ratio for every individual setup. If the potential profit does not justify the risk required to take the trade, then the math is not in your favor. A 1 to 1 risk-to-reward ratio might be acceptable for some, while others require at least 2 to 1. Determine what works for your strategy and refuse to take trades that do not meet your criteria. This patience is a form of risk management that prevents you from entering poor quality trades.

Advanced Sizing Considerations
Advanced traders often use dynamic sizing that adjusts based on the quality of the setup. A higher-probability setup might allow for a larger position size, while a speculative setup requires a smaller one. This requires a deep understanding of your own trading history and a clear set of criteria for defining what makes a setup high-quality. Do not attempt this unless you have a statistically significant sample size of trades that demonstrates your ability to identify these setups reliably.
Consider the time of day as a factor in your sizing logic. Market liquidity and volatility change significantly from the opening bell to the market close. You might find that you trade better during certain hours when the market noise is lower and the price action is clearer. Use your sizing to capitalize on these hours by potentially increasing your risk slightly, while reducing your risk during the choppy, low-volume hours where you tend to underperform.
Use simple sizing models
Keep your sizing logic simple. If you cannot explain your sizing model in one or two sentences, it is probably too complicated for you to use effectively under pressure. Complexity is the enemy of consistency in the heat of a trading session. Stick to a model that is easy to calculate, easy to follow, and easy to adjust based on the changing realities of your drawdown buffer. The simpler your approach, the less likely you are to make a mistake when it matters most.
Psychological Preparation for the Challenge
The psychological component of trading is just as important as the mathematical one. If you are constantly nervous about the size of your positions, it is a sign that you are over-leveraging. You should feel comfortable with the amount of money you are risking on every trade. If you cannot sleep at night or find yourself staring at your screen obsessively, your positions are too large. Scale back until you reach a point where you can execute your plan with a clear head.
Prepare yourself for the reality of losing. Every trader, no matter how skilled, will have losing days. The goal of your sizing model is not to prevent all losses, but to ensure that your losses remain small and manageable. When you accept that losing is an inevitable part of the process, you remove the fear that leads to poor decision-making. Approach every trade as a probability game, not as a desperate attempt to gain or to recover a previous loss.
Prepare for psychological pressure
Take regular breaks during your trading day. A clear mind is essential for making objective decisions. If you feel your emotions starting to affect your judgment, step away from the screen. Walk around, get some fresh air, and come back when you are ready to focus again. You are not a machine, and you should not expect yourself to operate like one. Manage your own well-being as carefully as you manage your account capital.
Final Takeaway
Use a personal daily stop well below the firm's hard limit. This is not a sign of poor trading but a cost of staying in the evaluation and being able to trade tomorrow. Recalculate your available buffer after every closed loss and before adding any correlated position. If the math does not fit your remaining buffer, do not force the trade. Consistency and mechanical discipline are your best tools for surviving the process.
A proper sizing sheet must make every assumption visible: entry point, stop price, tick or pip value, total quantity, estimated transaction costs, current equity, and remaining drawdown buffers. If those inputs cannot be verified and updated in seconds, do not increase your exposure. If you treat your account with this level of detail, you move away from gambling and toward a sustainable, professional approach to the evaluation challenge.